Showing posts with label Programming without really programming. Show all posts

April 23, 2011

Peachtree Extension


The point brought up by the previous post entitled "Tax Time" on this DBAcctg series is that a database system would be helped immensely by the computational capabilities integrated in an MS Excel.

I consider MS Excel to be the Michael Jordan of the MS Office basketball team.

Those, whose angle of programming comes strictly from a database knowledge, would understand how hard it is to create a native user-interface that involves complicated value-dependencies and calculations.

For example creating an MSAccess, Oracle, MySQL front-end for amortization initiation and adjustments will be quite a pain. Maybe that's why I heard that these banks of sub-prime debacle were actually trading the spreadsheets files of the loans.


here


MS Excel is quite adept in many other applications aside from matters relating to numbers. But it all will depend on the artistry of people using it:


In this installment of the series, we will focus on accounting data. - I would rather draw with a pen then use spreadsheet drawing. But just the same, some geeks have found a way to draw using numbers:


Kudos to these artists. Now as for to the Free PC CheckWriter, Check Voucher Printer for Peachtree:

I luckily was able to recover a file (from yr 2004) - a file usable as a check writer and check voucher filler/printer. Actually it is a form enabler/extension of Peachtree.

If the office apps you have is a basketball team, Peachtree will be a fairly common import center player for DBAccounting. It houses the Accounting data pretty well.

However if you are not a user of the said program, you may see in this file example that MS Excel is quite capable as a point guard in MS Office data collaboration and coordination by passing/receiving/processing the basketball (the data).

(For the later episode of this series, I will share a full DBAcctg strategy in file download format. I will provide it for Free! So stick around every now and then.)

On this file we're currently in - it came about because of a request by a friend in business (with some unique peculiarities):

  • they were encoding redundantly by using Peachtree, manually typing Check Vouchers and they were using check writer.

    (I am not sure what version of Peachtree was the extracted voucher entries he gave me, came from. So you have to double check if your Peachtree extract data is in the same structure)

  • one CV can be related to several checks. (It could be that some labor subcontractor companies they dealt with may have requested them to create checks based on a forwarded list of the workers).


  • Some quite common situations involved are as follows:

    • they have several checks formats (due to multiple banks for different kind of transactions - they don't have bank-approved corporate check form that big companies may have)

    • they were using a pre-printed check voucher forms


    The steps agreed were:

    • the bookkeeper will encode the CV entries in Peachtree

    • the said software is then used to output an extract of the CV entries

    • the extracted data is then used by the Excel utility to print CVs and related Checks

    Here was how it was achieved by using an MS Excel spreadsheet:


    Procedures for using the file:


  • The extracted Peachtree CV entry file is pasted to a designated spreadsheet area.

  • The tab for voucher printing will then be populated with choices of CV entries. Select the CV No. for printing and it will fetch the related accounting entry for printing.

  • Go to the tab for check writer to print the related data to checks.

  • Notes:

  • The Excel Check Writer/ CV Printer File must contain the compatible extract of the related Chart of Accounts (acct code sorted in ascending order).

  • Check Voucher can be modified/configured to your pre-designed CV Form by adjusting the formats and spacing of the print area.

  • Make sure on your Peachtree extract process that the Check Voucher sorting is in ascending order.

  • Check Writer can be modified/configured to your pre-designed multiple bank check formats by adjusting the formats and spacing of the print area per check type and defining the print range of each check types on the list provided.

  • IF needed, use this formula to translate money amount into words =mtalk({cell address},"Denomination","centavos")

  • The codes to enumerate the figures or amounts into words is in a module 3 accessed by pressing 'Alt-F11'. You can use this code to your any other 'Worksheet' by copying it in a module of that worksheet (or by exporting this module to that worksheet).

  • You must set the macro security to medium in order to have the VBA code execute.

  • To restrict movement and protect in CheckVoucher or in ChckWrtrInput tabs of the worksheet, protect them as follows:


  • Here is your Free File Download.

    As you can see, we resume our 'DBAcctg' series towards the climb. I hope you'll be benefited by the journey.


    Additional helpful links on Peachtree and MS Excel (medium to advanced users):
    * Export Peachtree to MS Excel
    * Realtime Peachtree and MS Excel Connection
    * Analysis of Peachtree via MS Excel Pivot Tables
    * Excel VBA (2010)
    * Excel VBA Editor

    ..ciao

    July 28, 2010

    Utilities, Add-ins, References

    There so many references and materials nowadays to help us in our PWORP (programming without really programming) endeavors and may support the series DB Accounting. The latter is not limited to accounting really, but it is a conceptualization of Distributed Data Collaboration. It is applicable to many more systems development on an "As-It-Happens" time-frame or just a measure to store data in acceptable formats complimenting mainframe implementation.
    _____________________________

    The utilities below are compatible with Windows/MS Office environment which is the typical set-up.

    1.) Tools are available, right there, in the applications we used. Among them, are the many wizards which we rarely use. This is perhaps, because our actual business requirements have their own quirks or because such wizards have no long lasting re-usability. However, with Data Coordination and Collaboration among these applications, the relevant templates and wizards will be of great help.

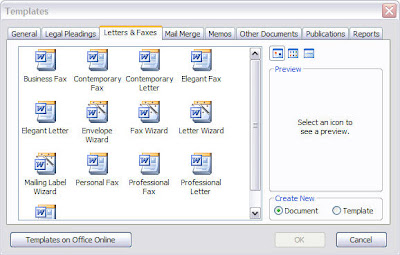
    a) Here are some worksheet templates available under MS Excel (it may differ according versions):


    b) MS Word Templates


    c) MS Access also contains many ready made solutions and database wizards.

    d) There are many other templates here:
    - MS Access templates
    - Microsoft templates
    ____________________________

    2. ) In Addition, here are some other non-Microsoft utilities which you can download and integrate into your work-in-progress computerization:

    a) Online csv viewer

    b) CSVed (this can complement our DB Acctg sample of spreadsheet form using CSV Data Container)


    c) J-Walk Enhanced Data Form Add-in

    d) For Task management and reminders with little performance overhead, Skynergy's TaskPrompt may fit your requirements instead of MS Outlook


    e)Application Managers and Organizers (can serve as an integrator switchboard for calling a Distributed Solution like in our DB Acctg Series)

    - Stardock's Fences as seen below:


    - Launchy as seen in this techmixer page
    - AppManager from codeplex.com
    - Folder view from tucows
    - still others more
    ___________________________

    3. ) For reference, the following videos and links may help you find the channels or sites that will give you step by step solutions for your needs:

    a) Using Excel 2003 and below Dialog-boxes:


    b) Data Validation:


    c) Using Sparklines (Dashboard purposes -Excel 2007/2010):


    d) Advanced Dashboard samples

    e) Creating a Macro:


    f) VBA code samples and reference

    g) Conventions for declarations using prefixes

    July 26, 2010

    Acctg DB: CSV as Data Container


    So we talked about The MS Office team. It's like the Chicago Bulls during it's heyday. MS Excel is our Michael Jordan and MS Access is our Pippen. What a tandem! Nevertheless, we need a center player and more, to handle the data. We are using data like a ball, we pass it in many creative ways and have it thru the goal in equally many ways.

    Using SQL Express is like importing Shaquille to our team. But for now, there are many other center players. MJ and Pippen could be enough to carry our project, but there are many times that personal differences may happen. That is just like the data coordination using Excel and Access. Things may get in the way that I will have difficulty to explain to the intended layman audiences.

    For automating these applications, we need the coach. The audience would not care about what length the coach has to do, to get them to work. So I decided to make an Excel "Add-in" for these matters. Running a team costs money and I may not be able to share this add-in freely.

    So for our enjoyment, we're bringing in another center player - CSV. With this, we skirt the thorny issues between MS Excel and MS Access (automation - like security, hidden instances, etc.). We are also able to distribute the burden to a fairly versatile database player.

    According to Wiki:

    - "A comma-separated values (CSV) file is a simple text format for a database table. Each record in the table is one line of the text file. Each field value of a record is separated from the next with a comma. Implementations of CSV can often handle field values with embedded line breaks or separator characters by using quotation marks or escape sequences. CSV is a simple file format that is widely supported, so it is often used to move tabular data between different computer programs that support the format."


    It is a very adaptable player and can be handled by the nuances of other applications or team players.

    According to Wiki:

    - "The CSV file format is very simple and supported by almost all spreadsheets and database management systems. Many programming languages have libraries available that support CSV files. Even modern software applications support CSV imports and/or exports because the format is so widely recognized. In fact, many applications allow .csv-named files to use any delimiter character."


    So here is the beginnings of a triangle offense, that you can easily follow with some modifications as needed:


    We are using the file "List.xls" we have earlier discussed. The said file has a VBA code for posting to MS Access but we are going to another range to create a version for posting to CSV.

    We created a user form on an area. We have created a tabular container linked to that form and we have another table that will store each entry, accumulating them in rows of data. The same form or another sheet can be used as a Dashboard for viewing the data before eventually posting it to the CSV holder (but we are not showing it just now - the "viewer or dashboard").

    Note on the video:
    Part A)
    - we are showing on the earlier part a review of how the List.xls file was able to undertake posting to MS Access.
    - the "=COUNTA(C7:C12)" formula was used to determine the count of rows to post
    - concatenation using the formula [="C7:G" &] plus the determined end row number designation was used to get the text containing the address of the tabular data to post (range name with dynamic dimension is not visible to MS Access)
    - this address is complemented by the VBA code: [ Sheet1.Range([j5].Value).Name = "usrlist"] viewable on the VBA section privy for sheet1, w/c redefines the area covered by the range name
    - there are also various notes/comments shown which reflect a possible way to determine completeness of the info needed - via count of the dimension of the table
    - the code however for prompting and disallowing the posting of incomplete data was not included for now

    Part B)
    - we created a spreadsheet form via cell format, borders, sheet background picture (w/c was also made available on a separate video before this series installment)
    - Selecting disconnected cell is done by pressing the 'Ctrl' button while we are clicking various cells or ranges. That way we can quickly apply similar formatting.
    - The single row table is directly linked to various input cell area and is used to data-form it for posting to the temporary tabular storage
    - the temporary storage range which will accumulate each posting for review is directly below
    - We used the record facility of Excel to copy paste value from the data-former to the temporary data container
    - The said data container can serve the purpose of final validation, as in when a check voucher is forwarded to the accounting manager for approval.
    - Notice that for simplicity we have created no id field yet (w/c will be helpful when operating searches for deletion or edit of a specified row entry)
    - For your purposes, you can also include the Data validation feature of Excel (for example on the input cell for age - to limit it to, say, '18' to '50' yrs)
    - You can also create formula using the "If" functions, to catch when an input cell has undesirable entry (like "0" for middle initial) or to replace that entry by other characters (See Excel help for "If" function)
    - Because of video length limit, we did not include application of cell and sheet protection

    VBA Part:

    More than 5 years ago, when I was doing a similar DB Acctg System, I was not fortunate to have an internet connection whether at home or office. Now, I'm glad, because of the wealth of materials available with which you can improve or build upon these techniques.

    For this exercise, we are perusing MrExcel's forum post (opens in new window). And editing it to our taste. Kudos to "TommyGun" who posted the code, made available for us.

    - we commented the MS Access code for posting the earlier section of the spreadsheet
    - note that the code here is using the shell approach of calling the mdb file and also note that the mdb file has an "AutoExec" named macro that transfers spreadsheet data to another mdb container and then closes itself automatically

    - for the "CSV" operation, we created a module and pasted the code from the forum
    - then we replace the "*" character with null so the code is usable
    - we edited the target CSV file: we included the path of our spreadsheet (but you may adjust this if the target file is not on the same folder as the spreadsheet) and we rename the target file to "UsersDB.csv"

    The modified code will depend on the following cell contents (which may differ with you):


    note:
    -test data are already used and some were posted to the temporary storage
    -there are formula for certain cells (cells which will be used by the code execution to find where to append and what data are involved)
    - the file exist has a value of "1" if there is already a CSV file existing to make the append with or without field names

    The temporary storage append is as follows:

    Sub Macro1()
    '
    ' Macro1 Macro
    ' Macro recorded 7/27/2010 by ****
    '

    '
    Range("C33:H33").Select
    Selection.Copy
    Range("C" & [p37]).PasteSpecial Paste:=xlPasteValues

    'replaced macro recorder codes:
    'Range("C36").Select
    'Selection.PasteSpecial Paste:=xlPasteValues, Operation:=xlNone, SkipBlanks _
    :=False, Transpose:=False
    End Sub

    On the other hand we made some adjustment to the code for appending to the csv file as follows:

    Sub Append2CSV()

    Dim tmpCSV As String 'string to hold the CSV info
    Dim f As Integer

    CSVFile = ThisWorkbook.Path & "\UsersDB.csv"

    f = FreeFile

    Open CSVFile For Append As #f
    tmpCSV = Range2CSV(Range([P36].Value)) 'we used a pointer cell to our source range
    Print #f, tmpCSV
    Close #f
    [P33].Value = 1 'this is our signal that a file already existed and add'l append will skirt the field names
    End Sub


    Also we made a slight change to the function portion, because the code presupposes that the table to append starts with "A1" or first row as follows:

    cr = list.Row '1 '''make adjustment to validate the starting row of table: if file is existent already don't include field names

    Also we have defined the delimiter in the following section of the said code:

    For Each r In list.Cells
    If r.Row = cr Then
    If tmp = vbNullString Then
    tmp = r.Value
    delimiter = ","
    Else
    tmp = tmp & delimiter & r.Value

    At the start, the delimiter is null but gets the value "," thereafter (we can adjust this value if needed).


    Conclusions:

    We have found the starting technique for using csv file in our IT system. MS Access should have no problem linking from such files and then combining them based on some field IDs that are common to various data files gathered.

    The implication is that if we create a system for PO Form (for purchasing) and another system for receiving (by the Warehouse), there is then a possibility of cross reference (all the way to an Accounting system, to the HR's mail-merge letters for certain parties).

    Also if you are presently using "Quickbooks" or "Peachtree", these strategies can be used to extend the system. All you have to do is study the csv-import field requirements of your existing systems. This will be useful, especially that each business has a different pre-printed transaction tickets like the Check Vouchers, Checks, etc. which usually require typing. So we can type on them and capture the data for export to an existing system.

    Most of this effort stems from our conceptualization and the spreadsheet know-how, which we can expect from most office personnel.

    If this series may help you then subscribe! Enjoy.

    July 25, 2010

    Acctg DB: Pros with Cons


    All right. Automating MS Office is no laughing matter. For example, the files I made in the article "Fast Forward" of this series, works to post data from Excel to MS Access.

    Oops, I forgot to tell, that to make a procedure (VBA code) callable from different sheet or button or worksheet, you have to transfer it to a module. Yes, it may confuse a layman, so I decided to employ a different approach. To adhere to PWRP (Programming Without Really Programming) principle, I decided to make the complications of these matters to myself. You may not know how to stop an invisible instance of Excel via code or such issues that spun my head when I first implemented this years ago. That is why I decided to make an Add-in which you can call within Excel to implement the system with "KISS" principle.

    In addition, I do not want to antagonize my JPIA and accountant friends with issues like MS Excel and MS Access being so hackable, so I am incorporating some security in the add-in that may help bulletproof the system. But doing such things are tough, I accede. However, I am conducting my own tests, and the strategy I found is fairly good (so far ... security vs cracking/hacking involves many aspects).

    In the meantime, going back to the series installment, here is how you may create a data capture design within the spreadsheet: Video (opens in new window) to the tune of "El Bimbo" by Eraserheads.

    The said video illustrates the design of forms using the spreadsheet. There is another back-end design strategy that involves going to the VBA window (can be seen by pressing "Alt-F11"). But I prefer to expose the user to the spreadsheet for the following reasons:

    1. The user being at ease with UI (user interface).
    2. Capability to populate the data by formula or reference to an existing Excel data.
    3. Capability for multi-row data (like the items listed in a Purchase Order).
    4. Ability for inter-field data dependencies (even inter-row) and dependent calculations.
    5. Images, textbox and other drawing features can be utilized.

    Anyway, the video shown above is about the following:
    - changing the 'backgound picture' of the spreadsheet
    - using 'fill color' on selected cells or range of cells
    - creating 'merge cells' for data entry
    - formating the cells for the following effects:
    *sunken effect - using "Cell", "Format", "Border": combining dark single lines for top and right borders together with light border lines on the right and bottom areas
    *raised effect - using light border on top and left sides with dark double border on right and bottom ( the top and left sides can also use double border styles for this effect)
    - combining the cell unprotect and the sheet protection (can be password-ed, select unlocked cells to restrict the user selection or focus to specified cells and hide formula)

    - the 'data validation', 'cell concatenation', 'conditional formatting' and other formatting techniques can also be employed here (see previous portion of these series or look for Excel help, in case additional info is needed for these features)

    In the meantime google "prcview" if you need to stop any process that may be running invisibly, in your course of experimenting with some automation.

    Also, there is a free useful app "TaskPrompt" from skynergy.com that can be incorporated in any system development consistent with this series. However the accompanying 'mdb' file of said download is password-ed. So if you want to interact with it with another interface, you have to ask them.

    Ciao and enjoy! And watch out for my Add-in coming soon.

    July 12, 2010

    Acctg DB: Fast Forward


    It took quite a while to update these series. I was thinking ahead and was shopping for an import player to play along with our MS Office team members. Looking around for a robust Database container is not that easy. My criteria were: - it has to be easy to work with, given the member players we have, it has to cost us nada and it has to be able to work in a networked system like a small business.

    I tried and tested several but I found out that MS SQL Server 2005 Express is free for download and I tried it with satisfactory result. So I decided to include this as the Shaq center of our MJ Excel-lead team.

    It is download-able at: MS SQL Server 2005 Express

    And here I will show you a technique I will name Alley-oop Slam (data alley-oop slam - that is or DAOS). It can be compared to a Michael Jordan alley-oop to Pippen for a slam dunk.

    Let's take this sample Excel list:

    Name the range, say "usrlist". Then save the file as List.xls.
    Open a blank MS Access database and create an MS Access macro as follows:


    Note the following parameters:
    Action: TransferSpreadsheet
    Transfer Type: Import
    Table Name: tblUsrList (.. referring to the destination MS Access Table container)
    File Name : C:\DBAcctg\List.xls (.. .. please adjust depending on the directory and filename from which the data is extracted from)
    Range : usrlist (.. the range name of content area from the spreadsheet)

    Now if you name the MS Access macro as "AutoExec", it will run whenever the MS Access Database is opened. Therefore whenever we are in the Excel spreadsheet we can execute the DAOS by a VBA code that opens the MS Access file.

    You can test it from the Excel UI by clicking on the 'record' button of the Excel 2003 "Visual Basic" toolbar and then clicking the 'stop' button. Press 'Alt' and 'F11' (simultaneously) and you will be taken to the VBA Editor window where you may complete the VBA code as follows:

    Sub Macro1()
    Shell "MSACCESS.exe C:\DBAcctg\Database1.mdb", vbMinimizedFocus
    End Sub

    (* note - The "Database1.mdb" above must be adjusted accordingly if have you named differently the Access file and/or the folder.)

    For this to be executed properly we have to create some adjustments.

    1) Our Excel VBA code must clear the list when it is already posted.

    2) It must make provision for possible changes in the number of rows to be posted by readjusting the definition of the range name "usrlist".

    3) It must contain a code to open the MS Access Database so that the data pass is communicated. (The above code will do)

    4) The VBA Excel code has to get a signal from MS Access before clearing the posted data from the spreadsheet list. The signal can be via a refresh of existing pivot table with count operation of the data contained in MS Access.

    Some other fine tuning can be as follows:

    5) Creation of another MS Access file that will be the real container of the data. The table to be used in "Database1.mdb" will be linked from the Ms Access data file container (or MS SQL Server 2005 Express - if so warranted in the future, especially for web-enabling the system).

    6) Adding the "Quit" or "close" MS Access macro line so that the file is closed after execution, leaving us with the spreadsheet interface.

    7) Renaming this data transfer macro to "AutoExec" and fine tuning the Excel data encoding interface (via validation, conditional formatting, protection, etc).

    For those who are more conversant with Accounting (and not even VBA) rather than Database, don't worry we will proceed on your phase of learning. So the code above is enough for now. You may also manually run the MS Access macro to test if data pass is successful.

    The point here is, we have the capability to use MS Excel as a very adept player to handle the ball and create the openings before data is passed to it's proper container. Excel will be good especially as the computational capability will be there in the front-end of the Accounting DB system. That means we don't need to open a calculator application when encoding data. We have more than enough on the UI (user interface) to do even such complicated automated data population like in a complicated mortgage schedule. I have watched certain Oracle programmer automate this system and I can say they are not able to do it as easily.

    Anyway, we will shift back and we will employ as much PWORP (Programming WithOut Really Programming) in next installment of this series.

    Subscribe and enjoy!


    -------------
    Creating MS Access 2003 macro:


    Creating MS Access macro (version 2007 & 2010):


    note:

    My examples will be using MS Office 2003 for backward compatibility. The MS Access macro above is captured from MS Access 2007 (they are essentially the same). Going around in MS Office 2007/2010 will be different because of the 'ribbon' interface design. For example, the "Developer" tab in the ribbon contains the buttons formerly in the "Visual Basic" toolbar of 2003 (and earlier). The MS Access 2007 macro creation is shown when you select the "Create" tab of the ribbon. The "TransferSpreadsheet" macro action in 2007 has some adjustments.


    ciao

    July 01, 2010

    Excel 2007/2010 Classic Ribbon Tab

    This, I think, is by far the easiest way for you to bring your favorite icons/buttons in the way you like 'em arranged under a 'Ribbon Tab' of your updated Excel 2007/2010. I am bringing it here because I know some of you dudes have recently upgraded at your office and it will be a hassle to work your deadlines under an unfamiliar interface.

    Steps:
    1) Open your old Excel application or any pc where it is not yet upgraded.

    2) Right click the toolbar area and select 'Customize'. A toolbar customization dialog will open. Select 'New' and a blank Toolbar, ready for you to populate with icon will appear. You can name this toolbar any name.

    3) Drag your selected icons or menu item from those you see into the new toolbar. Place it in the sequence you are most comfortable with. You may also click the 'Commands' tab of the 'Customize' dialog, as shown here, to reveal other icons that you think you may need.

    4) Take care that you do not over extend the new toolbar beyond the screen. If needed, you may create another blank toolbar to populate with icons or menu items. After you are satisfied, select the 'Reset' command button on the 'Customize' dialog under the 'Toolbars' tab as shown on the screen. This will repopulate the default Excel toolbars (you don't want to piss the user of that pc with missing icons).

    5) Now, click the 'Attach' command button. This will make you carry these toolbars and buttons with this particular workbook. Save this blank workbook under a name you can easily remember and someplace with your network (or usb/diskette) where you can retrieve using your upgraded Excel version. When you open the said workbook, it will appear under the 'Addin' tab of your upgraded Excel ribbon.

    There you have it. Congratulate yourself, you have programmed the ribbon without really programming! Bear in mind though that if you download any other add-in with it's own ribbon customization script, the buttons may clog on that same place. You may also reduce the space by right clicking the icons and selecting delete toolbar. Or you may learn the 'XML' scripting of the Excel ribbon (the steps of which, you may have otherwise already googled by now).

    Anyway, you've learned the easier way here. And I will share some more ways for you to program without really programming, until one day, we may wake up and find out we are already programming for real! Enjoy.

    Sample Classic / other fave icons imported into Excel 2007 (Note some buttons may have a different button/menu counterpart in the new versions):